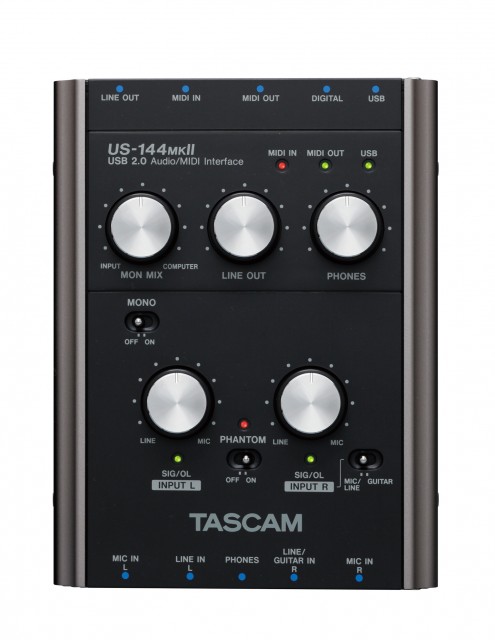
Today I got a Tascam US-144MKII from a colleague because he couldn’t use it anymore with Mac OSX. Apparently this USB2.0 audio interface stopped working on El Capitan. Tascam claims they’re working on a driver but they’re only generating bad publicity with that announcement it seems. So he gave it to me, maybe it would work on Linux.

First thing I did was plugging it in. The snd_usb_122l module got loaded but that was about it. So much for plug and play. There are reports though that this interface should work so when I got home I started digging a bit deeper. Apparently you have to disable the ehci_hcd USB driver, which is actually the USB2.0 controller driver, and force the US-144MKII to use the uhci_hcd USB1.1 driver instead so that it thinks it’s in USB1.1 mode. This limits the capabilities of the device but my goal for today was to get sound out of this interface, not getting the most out of it.
I quickly found out that on my trusty XPS13 forcing USB1.1 was probably not going to work because it only has USB3.0 ports. So I can disable the ehci_hcd driver but then it seems the xhci_hcd USB3.0 driver takes over. And disabling that driver effectively disables all USB ports. So I grabbed an older notebook with USB2.0 ports and disabled the ehci_hcd driver by unbinding it since it’s not compiled as a module. Unbinding a driver is done by writing the system ID of a device to a so-called unbind file of the driver that is bound to this device. In this case we’re interested in the system ID’s of the devices that use the ehci_hcd driver which can be found in /sys/bus/drivers/ehci-pci/:
# ls /sys/bus/pci/drivers/ehci-pci/
0000:00:1a.7  bind  new_id  remove_id  uevent  unbind
# echo -n "0000:00:1a.7" > /sys/bus/pci/drivers/ehci-pci/unbind
This will unbind the ehci_hcd driver from the device with system ID 0000:00:1a.7 which in this case is an USB2.0 controller.When plugging in the USB interface it now got properly picked up by the system and I was greeted with an active green USB led on the interface as proof.
$ cat /proc/asound/cards
 0 [Intel          ]: HDA-Intel - HDA Intel
                      HDA Intel at 0xf4800000 irq 46
 1 [US122L         ]: USB US-122L - TASCAM US-122L
                      TASCAM US-122L (644:8020 if 0 at 006/002
So ALSA picked it up as a device but it doesn’t show up in the list of sound cards when issuing aplay -l. This is because you have to tell ALSA to talk to the device in a different way then to a normal audio interface. Normally an audio interface can be addressed by using the hw plugin which is the most low-level ALSA plugin that does nothing more than talking to the driver and this is what most applications use, including JACK. The US-144MKII works differently though, its driver snd_usb_122l has to be accessed with the use of the usb_stream plugin which is part of the libasound2-plugins package and that allows you to set a PCM device name that can be used with JACK for instance. This can be done with the following .asoundrc file that you have to create in the root of your home directory:
pcm.us-144mkii {
        type usb_stream
        card "US122L"
}

ctl.us-144mkii {
        type hw
        card "US122L"
}
What we do here is creating a PCM device called us-144mkii and coupling that to the card name we got from cat /proc/asound/cards which is US122L. Of course you can name the PCM device anything you want. Almost all other examples name it usb_stream but that’s a bit confusing because that is the name of the plugin and you’d rather have a name that has some relation to the device you’re using. Also practically all examples use card numbers. But who says that the USB audio interface will always be card 0, or 1. It could also be 2, or 10 if you have 9 other audio interfaces. Other examples work around this by fixing the order of the numbers that get assigned to each available audio interface by adjusting the index parameter for the snd_usb_122l driver. But why do that when ALSA also accepts the name of the card? This also makes thing a lot easier to read, it’s now clear that we are coupling the PCM name us-144mkii to the card named US122L. And we’re avoiding having to edit system-wide settings. The ctl stanza is not strictly necessary but it prevents the following warning when starting JACK:
ALSA lib control.c:953:(snd_ctl_open_noupdate) Invalid CTL us-144mkii
control open "us-144mkii" (No such file or directory)
So with the .asoundrc in place you can try starting JACK:
$ jackd -P85 -t2000 -dalsa -r48000 -p512 -n2 -Cus-144mkii -Pus-144mkii
jackd 0.124.2
Copyright 2001-2009 Paul Davis, Stephane Letz, Jack O'Quinn, Torben Hohn and others.
jackd comes with ABSOLUTELY NO WARRANTY
This is free software, and you are welcome to redistribute it
under certain conditions; see the file COPYING for details

no message buffer overruns
JACK compiled with System V SHM support.
loading driver ..
apparent rate = 48000
creating alsa driver ... us-144mkii|us-144mkii|512|2|48000|0|0|nomon|swmeter|-|32bit
configuring for 48000Hz, period = 512 frames (10.7 ms), buffer = 2 periods
ALSA: final selected sample format for capture: 24bit little-endian in 3bytes format
ALSA: use 2 periods for capture
ALSA: final selected sample format for playback: 24bit little-endian in 3bytes format
ALSA: use 2 periods for playback
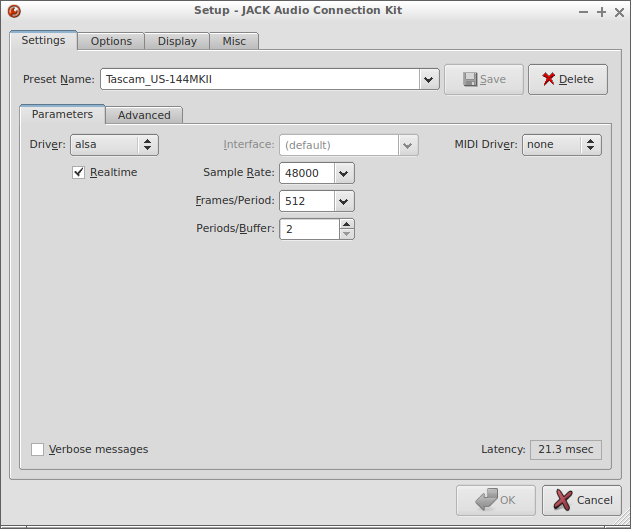
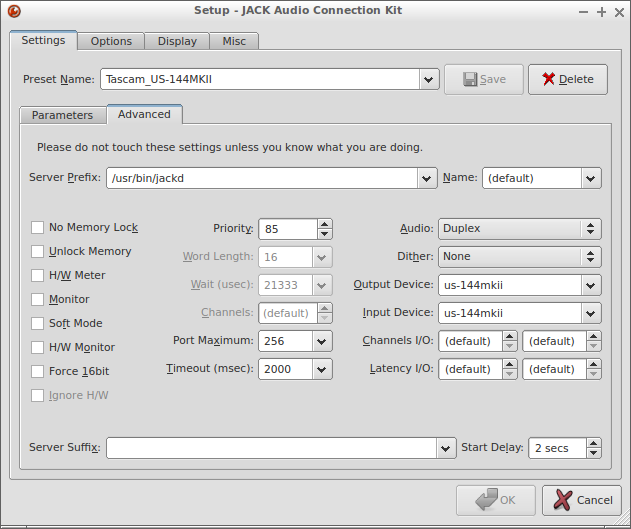
This translates to the following settings in QjackCtl:


Don’t expect miracles of this setup. You won’t be able to achieve super low-latencies but at least you can still use your Tascam US-144MKII instead of having to give it away to a colleague.
