Ever since I did an acid set with my brother in law at the now closed bar De Vinger I’ve been playing with the idea of creating some kind of synth module out of a Raspberry Pi. The Raspberry Pi 2 should be powerful enough to run a complex synth like ZynAddSubFX. When version 2.5.1 of that synth got released the idea resurfaced again since that version allows to remote control a running headless instance of ZynAddSubFX via OSC that is running on for instance a Raspberry Pi. I looked at this functionality before a few months ago but the developer was just starting to implement this feature so it wasn’t very usable yet.
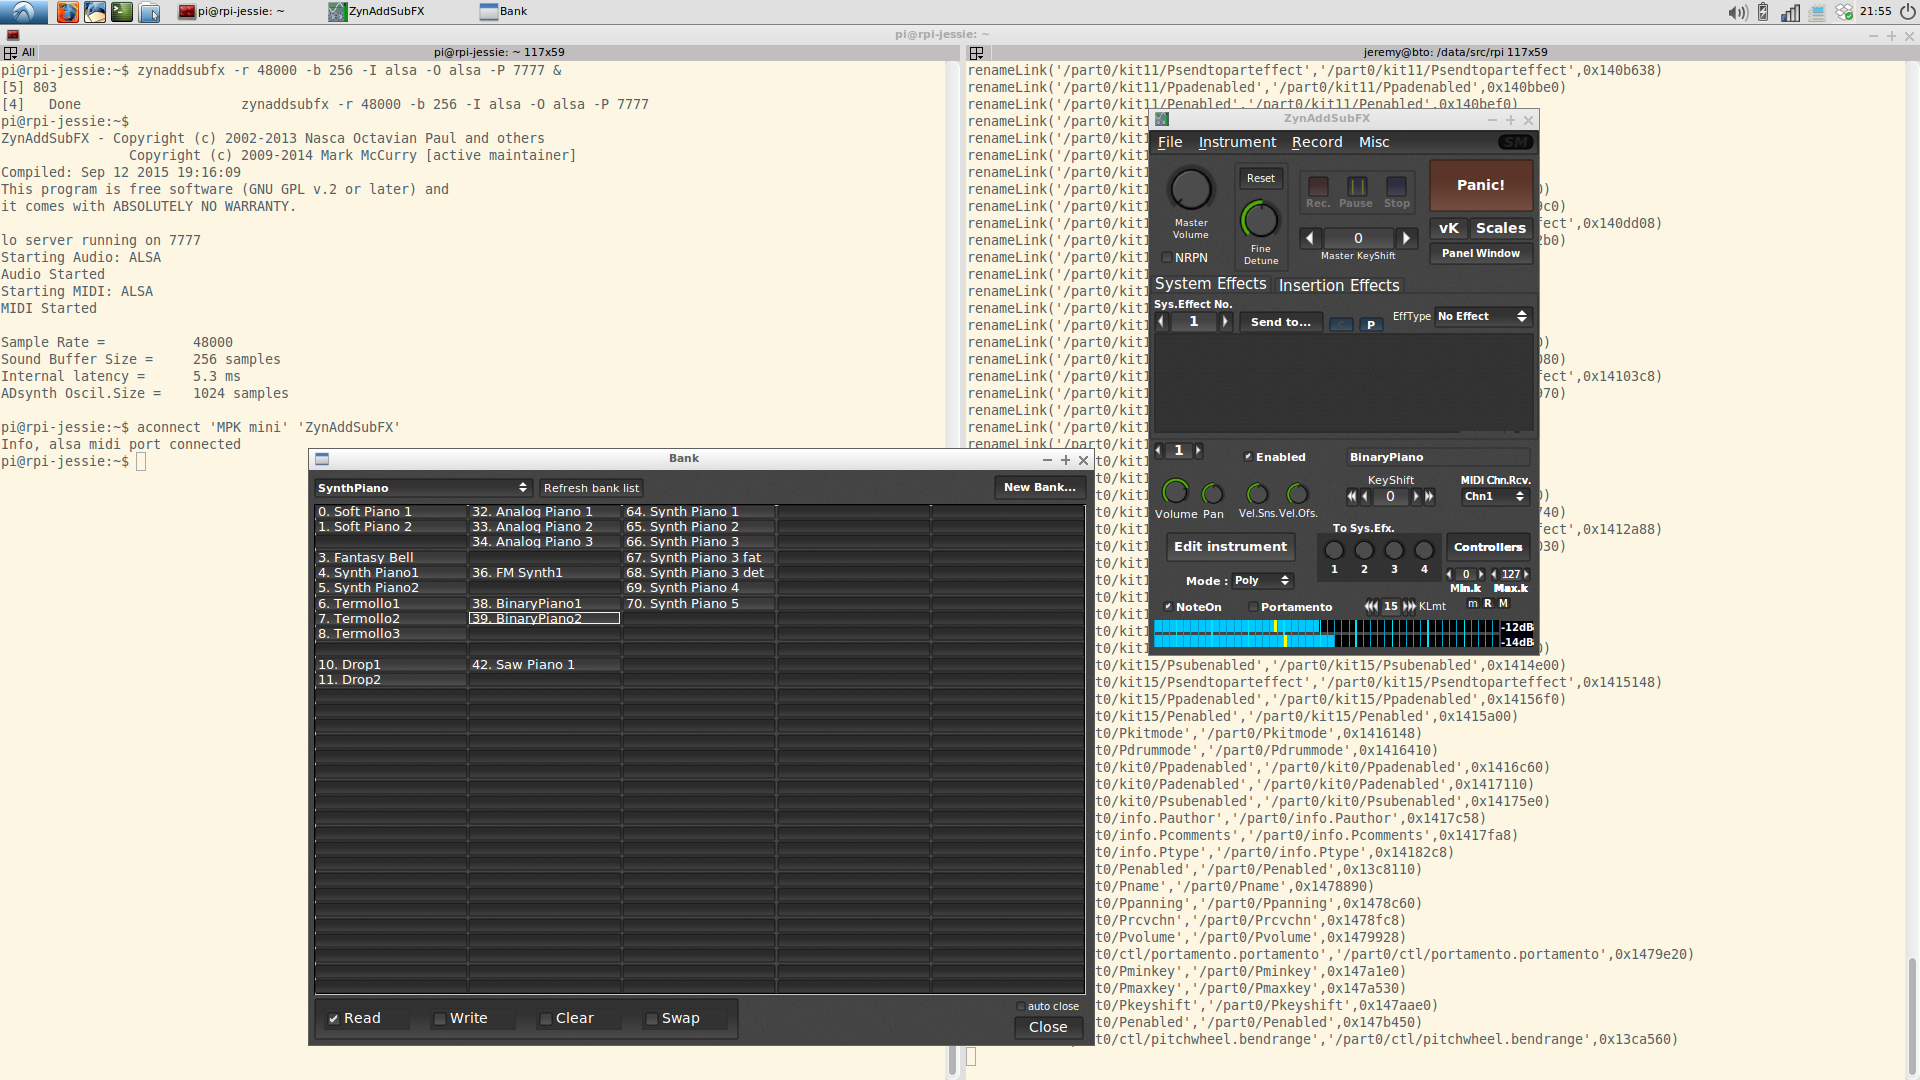 But with the release of ZynAddSubFX 2.5.1 the stabilitity of the zynaddsubfx-ext-gui utility has improved to such an extent that it’s a very usable tool. In the above screenshot you can see zynaddsubfx-ext-gui running on my notebook with Ubuntu 14.04 controlling a remote instance of ZynAddSubFX running on a Raspberry Pi.
So basically all the necessary building blocks for a synth module are there. Coupled with my battered Akai MPK Mini and a cheap PCM2704 USB DAC I started setting up a test setup.
For the OS on the Raspberry Pi 2 I chose Debian Jessie as I feel Raspbian isn’t getting you the most out of your Pi. It’s running a 4.1.6 kernel with the 4.1.5-rt5 RT patch set, which applied cleanly and seems to run so far:
pi@rpi-jessie:~$ uname -a
Linux rpi-jessie 4.1.6-rt0-v7 #1 SMP PREEMPT RT Sun Sep 13 21:01:19 CEST 2015 armv7l GNU/Linux
This isn’t a very clean solution of course so let’s hope a real 4.1.6 RT patch set will happen or maybe I could give the 4.1.6 PREEMPT kernel that rpi-update installed a try. I packaged a headless ZynAddSubFX for the RPi on my notebook using pbuilder with a Jessie armhf root and installed the package for Ubuntu 14.04 from the KXStudio repos. I slightly overclocked the RPi to 1000MHz and set the CPU scaling governor to performance. The filesystem is Ext4, mounted with noatime,nobarrier,data=writeback.
To get the USB audio interface and the USB MIDI keyboard into line I had to add the following line to my /etc/modprobe.d/alsa.conf file:
options snd-usb-audio index=0,1 vid=0x08bb,0x09e8 pid=0x2704,0x007c
This makes sure the DAC gets loaded as the first audio interface, so with index 0. Before adding this line the Akai would claim index 0 and since I’m using ZynAddSubFX with ALSA it couldn’t find an audio interface. But all is fine now:
pi@rpi-jessie:~$ cat /proc/asound/cards
 0 [DAC            ]: USB-Audio - USB Audio DAC
                      Burr-Brown from TI USB Audio DAC at usb-bcm2708_usb-1.3, full speed
 1 [mini           ]: USB-Audio - MPK mini
                      AKAI PROFESSIONAL,LP MPK mini at usb-bcm2708_usb-1.5, full speed
So no JACK as the audio back-end, the output is going directly to ALSA. I’ve decided to do it this way because I will only be running one single application that uses the audio interface so basically I don’t need JACK. And JACK tends to add a bit of overhead, you barely notice this on a PC system but on small systems like the Raspberry Pi JACK can consume a noticeable amount of resources. To make ZynAddSubFX use ALSA as the back-end I’m starting it with the -O alsa option:
zynaddsubfx -r 48000 -b 256 -I alsa -O alsa -P 7777
The -r option sets the sample rate, the -b option sets the buffer size, -I is for the MIDI input and the -P option sets the UDP port on which ZynAddSubFX starts listening for OSC messages. And now that’s the cool part. If you then start zynaddsubfx-ext-gui on another machine on the network and tell it to connect to this port it starts only the GUI and sends all changes to the GUI as OSC messages to the headless instance it is connected to:
zynaddsubfx-ext-gui osc.udp://10.42.0.83:7777
Next up is stabilizing this setup and testing with other kernels or kernel configs as the kernel I’ve cooked up now isn’t a viable long-term solution. And I’d like to add a physical MIDI in and maybe a display like described on the Samplerbox site. And the project needs a casing of course.
Great! I didn’t know how to get the ext-gui to work. You gave the answer. Thanks. A similar project is my DIY midi piano with 4x mpr121 touch sensors. Since now I controlled the osc commands with oscprompt which gives you the same access to the rich featured zynaddsubfx. The platform is an Odroid-C1+ with HiFi shield. It is running smoothly even with X enabled and controlled via remote desktop (vnc). But tomorrow I’ll test it headless with ext-gui and hope it will perfom even better without any glitches.
Tested it. GREAT! You can use it vice versa. So maybe I’ll use the little Odroid-C1+ only as thin client with zynaddsubfx-ext-gui to control the big machines. Do you know if there are plans to develop something osc and zyn related for android?
Hi Georg, as far as I know there are no plans for developing a remote ZynAddSubFX Android client. Great idea though, it would be awesome to control ZynAddSubFX with a tablet over WiFi.
Hi Jeremy,
found a solution for that already . It is possible to control the zyn with TouchDaw for Android (available on G*PLAY). It has OSC on board. Open the keyboard and there klick in th left upper corner (on some stripes). Klick on “Program/Bank changes” and back in the keyboard on prog+ to change instruments. It works perfectly, but you have to know the bank/prog numbers by heart (oooouuuf) or print them out.
Didn’t think about that! That’s just super nice, to be able to control a headless instance of ZynAddSubFX from your tablet.