Building a synth module using a Raspberry Pi

Ever since I did an acid set with my brother in law at the now closed bar De Vinger I’ve been playing with the idea of creating some kind of synth module out of a Raspberry Pi. The Raspberry Pi 2 should be powerful enough to run a complex synth like ZynAddSubFX. When version  2.5.1 of that synth got released the idea resurfaced again since that version allows to remote control a running headless instance of ZynAddSubFX via OSC that is running on for instance a Raspberry Pi. I looked at this functionality before a few months ago but the developer was just starting to implement this feature so it wasn’t very usable yet.
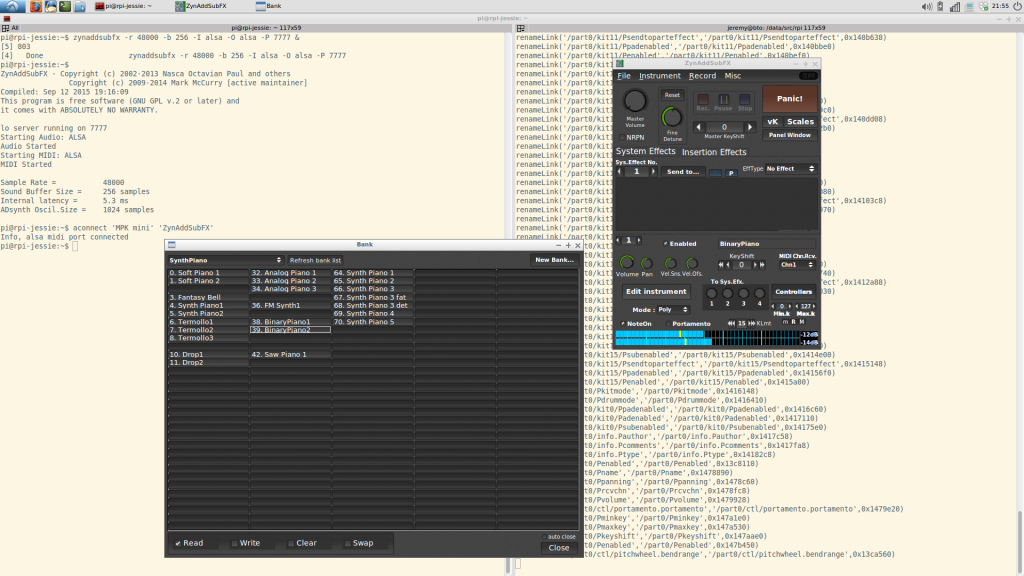
zynaddsubfx-ext-guiBut with the release of ZynAddSubFX 2.5.1 the stabilitity of the zynaddsubfx-ext-gui utility has improved to such an extent that it’s a very usable tool. In the above screenshot you can see zynaddsubfx-ext-gui running on my notebook with Ubuntu 14.04 controlling a remote instance of ZynAddSubFX running on a Raspberry Pi.

So basically all the necessary building blocks for a synth module are there. Coupled with my battered Akai MPK Mini and a cheap PCM2704 USB DAC I started setting up a test setup.

For the OS on the Raspberry Pi 2 I chose Debian Jessie as I feel Raspbian isn’t getting you the most out of your Pi. It’s running a 4.1.6 kernel with the 4.1.5-rt5 RT patch set, which applied cleanly and seems to run so far:

pi@rpi-jessie:~$ uname -a
Linux rpi-jessie 4.1.6-rt0-v7 #1 SMP PREEMPT RT Sun Sep 13 21:01:19 CEST 2015 armv7l GNU/Linux

This isn’t a very clean solution of course so let’s hope a real 4.1.6 RT patch set will happen or maybe I could give the 4.1.6 PREEMPT kernel that rpi-update installed a try. I packaged a headless ZynAddSubFX for the RPi on my notebook using pbuilder with a Jessie armhf root and installed the package for Ubuntu 14.04 from the KXStudio repos. I slightly overclocked the RPi to 1000MHz and set the CPU scaling governor to performance. The filesystem is Ext4, mounted with noatime,nobarrier,data=writeback.

To get the USB audio interface and the USB MIDI keyboard into line I had to add the following line to my /etc/modprobe.d/alsa.conf file:

options snd-usb-audio index=0,1 vid=0x08bb,0x09e8 pid=0x2704,0x007c

This makes sure the DAC gets loaded as the first audio interface, so with index 0. Before adding this line the Akai would claim index 0 and since I’m using ZynAddSubFX with ALSA it couldn’t find an audio interface. But all is fine now:

pi@rpi-jessie:~$ cat /proc/asound/cards
 0 [DAC            ]: USB-Audio - USB Audio DAC
                      Burr-Brown from TI USB Audio DAC at usb-bcm2708_usb-1.3, full speed
 1 [mini           ]: USB-Audio - MPK mini
                      AKAI PROFESSIONAL,LP MPK mini at usb-bcm2708_usb-1.5, full speed

So no JACK as the audio back-end, the output is going directly to ALSA. I’ve decided to do it this way because I will only be running one single application that uses the audio interface so basically I don’t need JACK. And JACK tends to add a bit of overhead, you barely notice this on a PC system but on small systems like the Raspberry Pi JACK can consume a noticeable amount of resources. To make ZynAddSubFX use ALSA as the back-end I’m starting it with the -O alsa option:

zynaddsubfx -r 48000 -b 256 -I alsa -O alsa -P 7777

The -r option sets the sample rate, the -b option sets the buffer size, -I is for the MIDI input and the -P option sets the UDP port on which ZynAddSubFX starts listening for OSC messages. And now that’s the cool part. If you then start zynaddsubfx-ext-gui on another machine on the network and tell it to connect to this port it starts only the GUI and sends all changes to the GUI as OSC messages to the headless instance it is connected to:

zynaddsubfx-ext-gui osc.udp://10.42.0.83:7777

Next up is stabilizing this setup and testing with other kernels or kernel configs as the kernel I’ve cooked up now isn’t a viable long-term solution. And I’d like to add a physical MIDI in and maybe a display like described on the Samplerbox site. And the project needs a casing of course.
Building a synth module using a Raspberry Pi

Media units

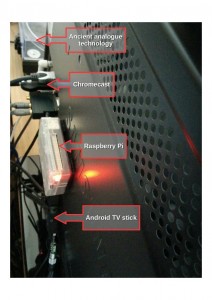
media_units_editThe MK808 Android TV stick with a PCM2704 USB audio interface runs Debian Jessie with MPD and serves as our mediaplayer for audio files. It draws its power from the USB port of our cable modem so it’s always on. Most of the time Indie Pop Rocks is playing. It’s hooked up to the network via WiFi. We use MPDroid to control it.

The Raspberry Pi runs OpenELEC with Kodi. We use this for watching all kinds of video files that we stream from our NAS (an aging WD My Book Live that runs Debian Lenny) via an NFS share. It is connected to the network via ethernet.

The Chromecast is for watching Netflix. When we just got it we had some issues with connecting it to the network but after replacing our old router with an ASUS RT-AC68U it worked flawlessly.

The Technics SL-1210MK2 with Ortofon headshell and cartridge is for listening music on vinyl, you know those round black plastic units from the past with grooves in them. It doesn’t have any network connections and doesn’t run an OS. It does send electrical current to a NAD C 325BEE Stereo Integrated Amplifier with Dali Concept 2 speakers. Yeah, I’m a 2.0 guy.

The TV is an old pre Smart TV Samsung but as it still works we probably won’t replace it for the time being. It does have CEC so we can control the TV, RPi and Chromecast with a single remote.

Media units

CarPC v1.0

As our collection of MP3 CD’s was wearing out I thought why not put a small embedded board with a big drive in our car? I dug up a Cubieboard2 that was gathering dust and started hacking. The goal:

  • Small system based on Debian Jessie
  • MPD to serve the audio files
  • Remote control via WiFi
  • Big drive
  • Acceptable boot time
  • Basic protection against file system corruption

Putting a bog standard Debian Jessie on the Cubieboard2 was quite straightforward with the help of the linux-sunxi.org wiki. The board booted with the standard kernel but unfortunately no sound. Luckily I had just received some ultra-cheap PCM2704 USB audio interfaces and these worked and sounded great too. WiFi worked out of the box but the rtl8192cu driver of the 3.16 kernel for the Realtek RTL8192CU chipset has the tendency to quickly go into suspension and as this driver doesn’t have any power management options I ended up with a hacky for loop in /etc/rc.local that pings all IP’s in the DHCP range. I quickly dropped this iffy set-up as it just didn’t work out that well and ended up using a DKMS based solution that made it possible to control power management of the WiFi dongle. Next hurdle was hostapd that stopped working with this alternative driver. But with the help of the hostapd-rtl871xdrv GitHub repo I managed to cook up a fully working hostapd Debian package.

Next up was the hard drive. I first tried a USB drive but the Cubieboard2 just couldn’t provide enough juice to power the drive properly together with the WiFi dongle. I also tried with my Raspberry Pi’s but those had the same issues. So I had to resort to a SATA drive. Of course I bought a 3.5″ drive first because those are cheaper. But you can’t power a 3.5″ drive with the SATA cable that comes with the Cubieboard2 and as I had a bit of a deadline I returned it for a 2.5″ drive and that works like a charm. I installed MPD, copied my music collection to the hard drive, fired up MPD and was greeted with a segmentation fault. Apparently the Jessie MPD package has issues with the sticker database file so I installed MPD from the backports repo and that version runs without any complaints so far.

For some basic protection against corruption by sudden power loss I created separate partitions for /home and /var on the SD card that are mounted rw with a couple of options to reduce corruption (sync,commit=1,data=journal) and / is mounted ro, just like the big hard drive with the audio files. /tmp is being mounted as tmpfs in RAM. Boot time is about 15 seconds and I’m OK with that. To remotely shut down the CarPC via WiFi I use a JuiceSSH homescreen shortcut of a connection that runs a simple shutdown -h now snippet.

After I had mounted everything in our car the thing wouldn’t boot though. Swapped the 1A USB car adapter for a 2.1A version and then the CarPC came up properly. Installed MPDroid on my Nexus 5 to control MPD via WiFi and so far, so good!


Cubieboard2 based CarPC


Addendum

Sometimes the CarPC became unreachable via WiFi. The culprit was that the DHCP service (udhcpd) didn’t always come up because it was sometimes started before hostapd. I fixed this by copying /var/run/systemd/generator.late/udhcpd.service to /etc/systemd/system/udhcpd-custom.service and adding hostapd.service to the After line and adding a Requires=hostapd.service line. I also added a [Install] stanza with the line WantedBy=multi-user.target. I then disabled udhcpd.service and enabled udhcpd-custom.service.

Addendum 2

Hostapd didn’t always start flawlessly either so I copied /var/run/systemd/generator.late/hostapd.service to /etc/systemd/system/hostapd-custom.service and added sys-subsystem-net-devices-wlan0.device to the After and Wants lines. Also added an [Install] stanza, disabled hostapd.service and enabled hostapd-custom.service.

CarPC v1.0