CarPC v1.0

As our collection of MP3 CD’s was wearing out I thought why not put a small embedded board with a big drive in our car? I dug up a Cubieboard2 that was gathering dust and started hacking. The goal:

  • Small system based on Debian Jessie
  • MPD to serve the audio files
  • Remote control via WiFi
  • Big drive
  • Acceptable boot time
  • Basic protection against file system corruption

Putting a bog standard Debian Jessie on the Cubieboard2 was quite straightforward with the help of the linux-sunxi.org wiki. The board booted with the standard kernel but unfortunately no sound. Luckily I had just received some ultra-cheap PCM2704 USB audio interfaces and these worked and sounded great too. WiFi worked out of the box but the rtl8192cu driver of the 3.16 kernel for the Realtek RTL8192CU chipset has the tendency to quickly go into suspension and as this driver doesn’t have any power management options I ended up with a hacky for loop in /etc/rc.local that pings all IP’s in the DHCP range. I quickly dropped this iffy set-up as it just didn’t work out that well and ended up using a DKMS based solution that made it possible to control power management of the WiFi dongle. Next hurdle was hostapd that stopped working with this alternative driver. But with the help of the hostapd-rtl871xdrv GitHub repo I managed to cook up a fully working hostapd Debian package.

Next up was the hard drive. I first tried a USB drive but the Cubieboard2 just couldn’t provide enough juice to power the drive properly together with the WiFi dongle. I also tried with my Raspberry Pi’s but those had the same issues. So I had to resort to a SATA drive. Of course I bought a 3.5″ drive first because those are cheaper. But you can’t power a 3.5″ drive with the SATA cable that comes with the Cubieboard2 and as I had a bit of a deadline I returned it for a 2.5″ drive and that works like a charm. I installed MPD, copied my music collection to the hard drive, fired up MPD and was greeted with a segmentation fault. Apparently the Jessie MPD package has issues with the sticker database file so I installed MPD from the backports repo and that version runs without any complaints so far.

For some basic protection against corruption by sudden power loss I created separate partitions for /home and /var on the SD card that are mounted rw with a couple of options to reduce corruption (sync,commit=1,data=journal) and / is mounted ro, just like the big hard drive with the audio files. /tmp is being mounted as tmpfs in RAM. Boot time is about 15 seconds and I’m OK with that. To remotely shut down the CarPC via WiFi I use a JuiceSSH homescreen shortcut of a connection that runs a simple shutdown -h now snippet.

After I had mounted everything in our car the thing wouldn’t boot though. Swapped the 1A USB car adapter for a 2.1A version and then the CarPC came up properly. Installed MPDroid on my Nexus 5 to control MPD via WiFi and so far, so good!
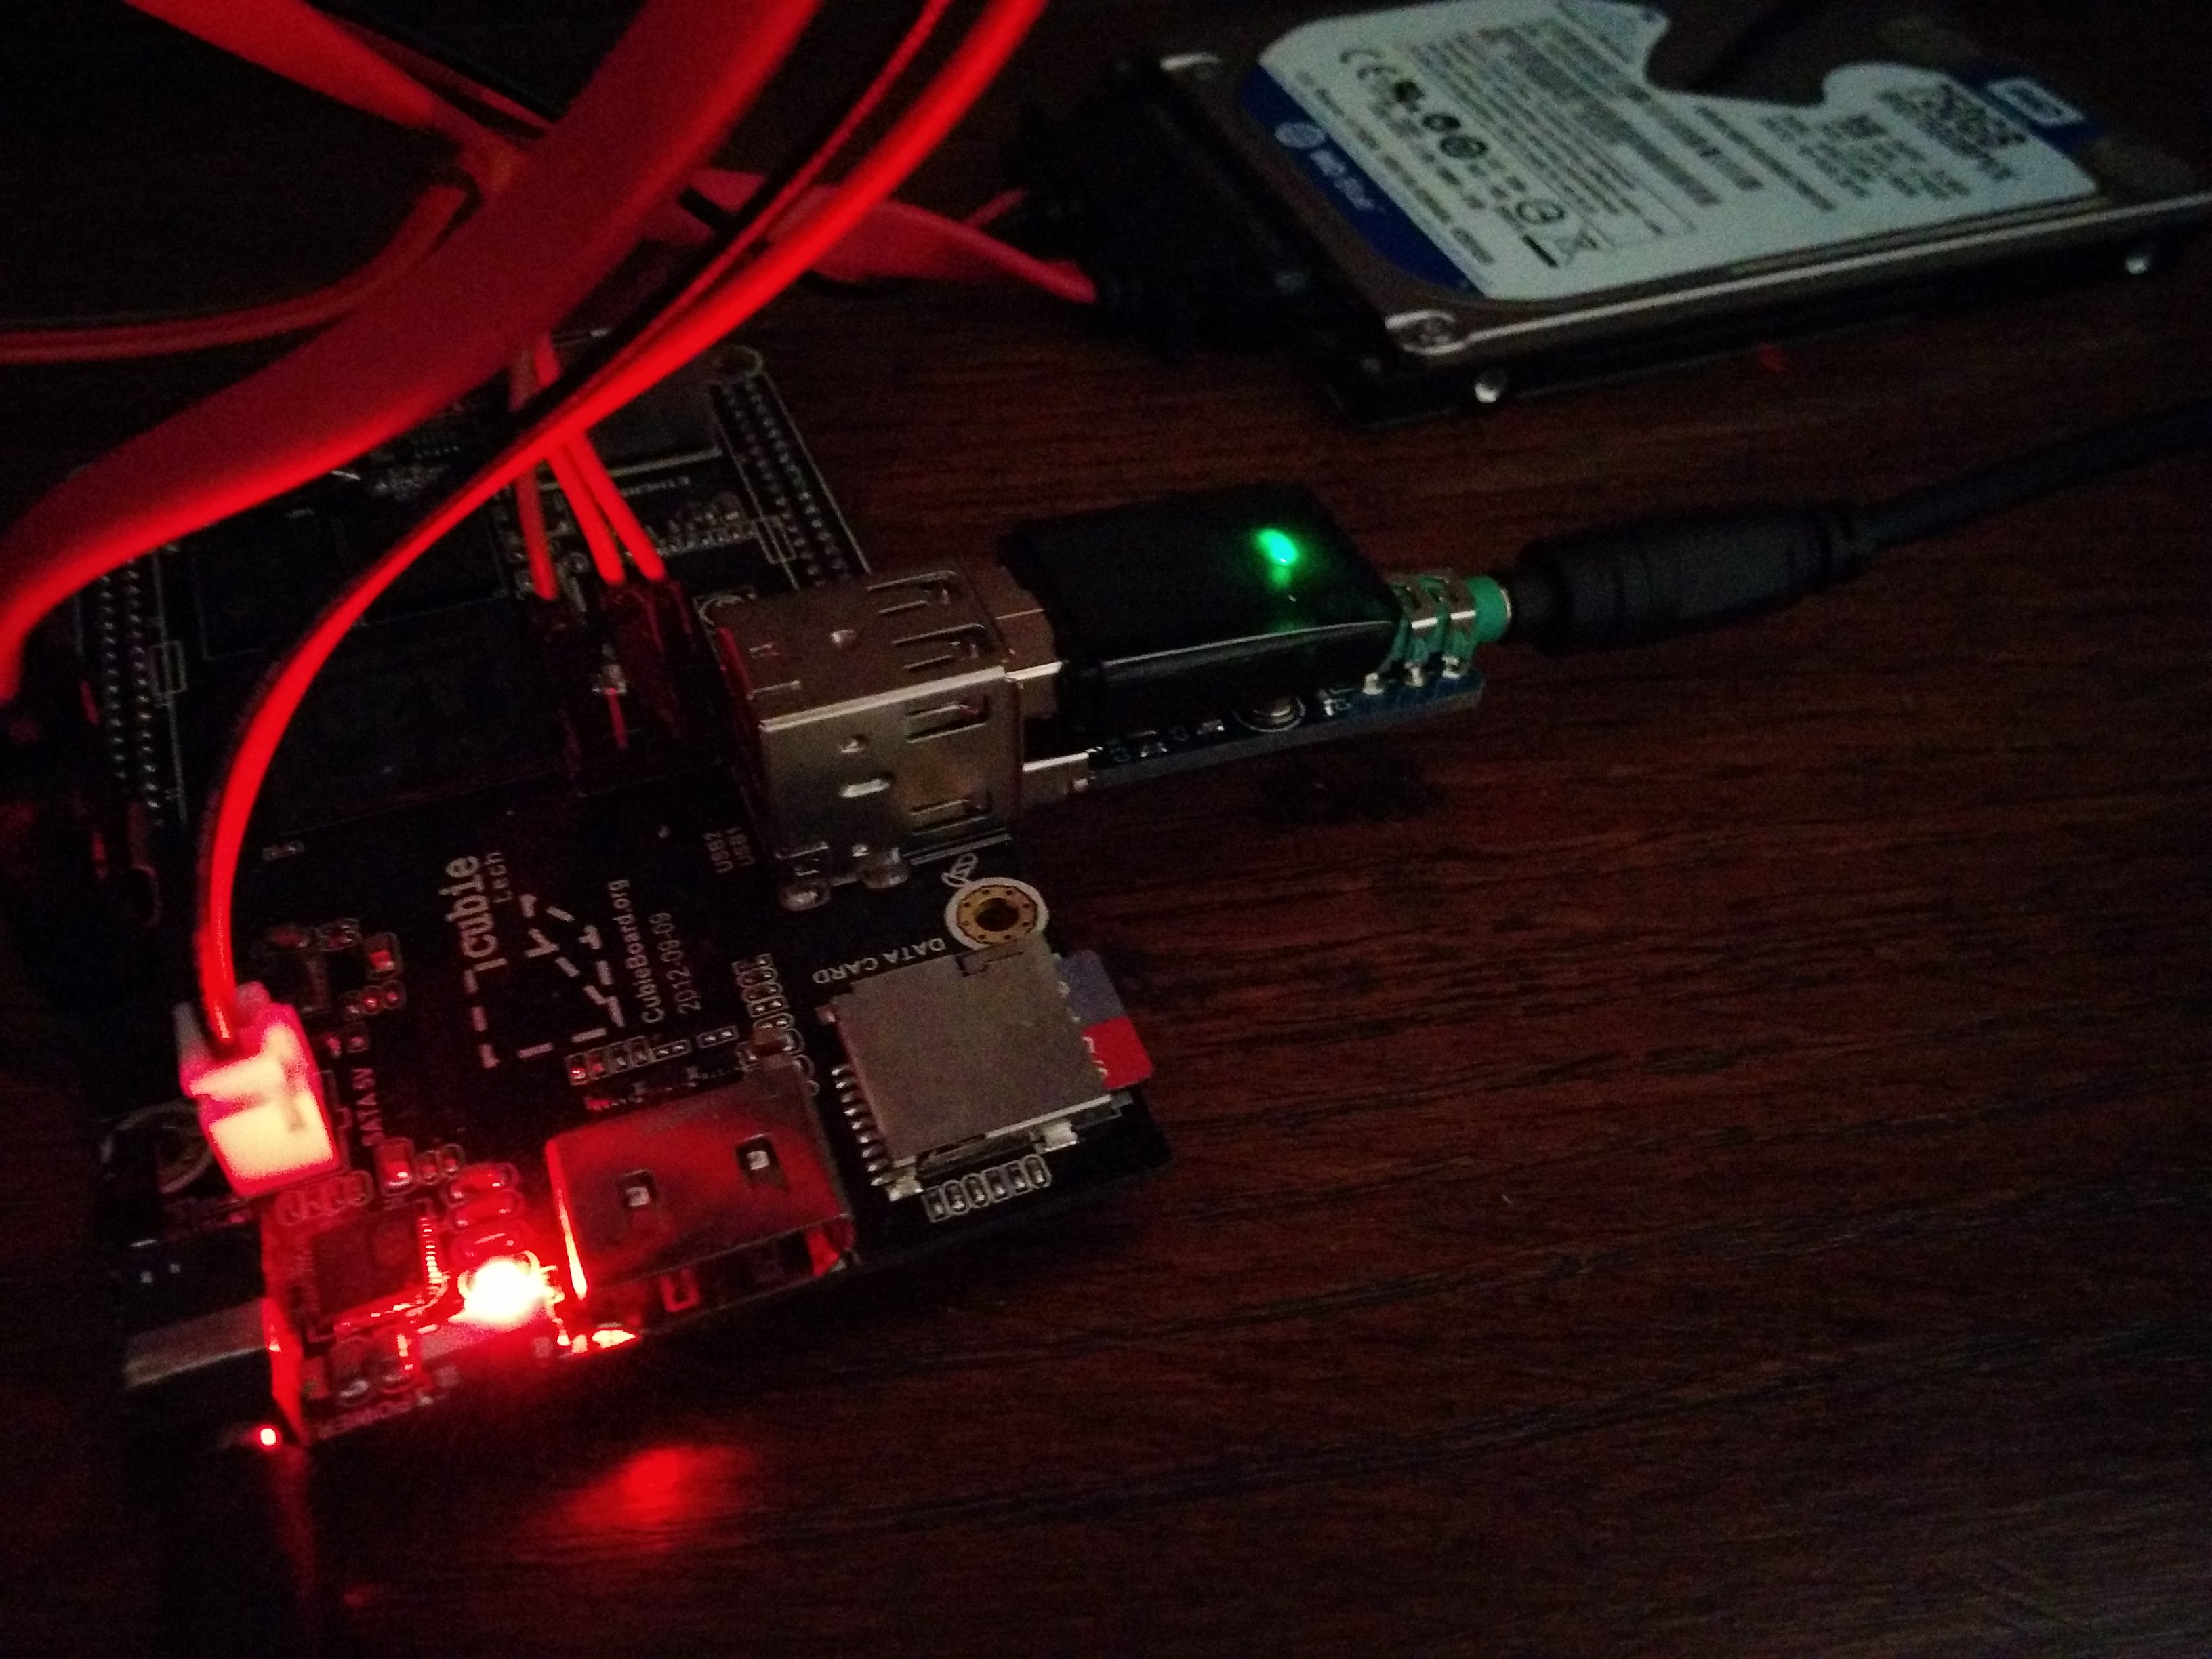
 

Cubieboard2 based CarPC


Addendum

Sometimes the CarPC became unreachable via WiFi. The culprit was that the DHCP service (udhcpd) didn’t always come up because it was sometimes started before hostapd. I fixed this by copying /var/run/systemd/generator.late/udhcpd.service to /etc/systemd/system/udhcpd-custom.service and adding hostapd.service to the After line and adding a Requires=hostapd.service line. I also added a [Install] stanza with the line WantedBy=multi-user.target. I then disabled udhcpd.service and enabled udhcpd-custom.service.

Addendum 2

Hostapd didn’t always start flawlessly either so I copied /var/run/systemd/generator.late/hostapd.service to /etc/systemd/system/hostapd-custom.service and added sys-subsystem-net-devices-wlan0.device to the After and Wants lines. Also added an [Install] stanza, disabled hostapd.service and enabled hostapd-custom.service.

CarPC v1.0

Packaging Python Stuff

While packaging Tuna I ran into an issue for which I couldn’t easily find a workaround on the ubiquitous search engine. Tuna depends on some unavailable Python applications so those had to be packaged too. After having successfully tested the packages locally with pbuilder I uploaded them to Launchpad and noticed that they failed to build. Apparently the Python installer setup.py wants to install in /usr/lib/python2.7/site-packages and while that worked fine locally with pbuilder, Launchpad had an issue with that:

Found files in /usr/lib/python2.7/site-packages (must be in dist-packages for python2.7).
debian/python-schedutils/usr/lib/python2.7/site-packages
debian/python-schedutils/usr/lib/python2.7/site-packages/schedutils.so
debian/python-schedutils/usr/lib/python2.7/site-packages/schedutils-0.4-py2.7.egg-info
dh_builddeb.pkgbinarymangler: dpkg-deb --build debian/python-schedutils .. returned exit code 1
make: *** [binary-arch] Error 1
dpkg-buildpackage: error: /usr/bin/fakeroot debian/rules binary-arch gave error exit status 2

Apparently the files had to be installed in /usr/lib/python2.7/dist-packages but how to instruct the installer to do so without having to resort to ugly hacks? As I couldn’t find any useful answers on the web I asked falkTX on #kxstudio. He said the setup.py installer has a flag to install to dist-packages instead of site-packages, --install-layout deb. So I added that to the debian/rules file and gave it another spin:

#!/usr/bin/make -f
# -*- makefile -*-
# Sample debian/rules that uses debhelper.
# This file was originally written by Joey Hess and Craig Small.
# As a special exception, when this file is copied by dh-make into a
# dh-make output file, you may use that output file without restriction.
# This special exception was added by Craig Small in version 0.37 of dh-make.

# Uncomment this to turn on verbose mode.
#export DH_VERBOSE=1

%:
        dh $@

override_dh_auto_build:
        python setup.py build

override_dh_auto_install:
        python setup.py install --skip-build --prefix /usr --root $(CURDIR) --install-layout deb

Now both pbuilder and Launchpad built the package without any issues.

Packaging Python Stuff

LV2 gaining momentum

The number of new LV2 plugins being released is steadily growing. The last couple of months at least the following LV2 plugins have been released:

  • Bitrot (a set of LV2 and LADSPA plugins for glitch effects)
  • beatslash-lv2 (a set of plugins for live beat repeating and beat slicing)
  • deteriorate-lv2 (a set of plugins to deteriorate the sound quality of live inputs)
  • midimsg-lv2 (a set of plugins to transform midi output into usable values to control other plugins)
  • QmidiArp (LV2 plugins of the three QMidiArp modules)
  • x42-plugins (collection of LV2 plugins: tuner, oscillator, x-fader, audio-level meters, midi filters etc.)
  • BLOP-LV2 (port of the LADSPA BLOP plugins)

Haven’t tried them all of them yet but the ones I did try (the QmidiArp modules as plugins and some of the x42 plugins) proved to be very promising. Besides new plugins being released work continues on a great number of plugins, the LV2 framework itself and on tools facilitating in the creation or building of LV2 plugins. Especially falkTX is in the vanguard with his current work on getting his Carla plugin host to work as a LV2 plugin. This would open up a lot of possibilities like using it in hosts that don’t support all plugin frameworks (think Ardour and DSSI support). In the meanwhile the guitarix team continues to add great LV2 plugins to their ever growing collection and Dave Robillard, the main author of LV2, doesn’t sit still either with releasing updated versions of the building blocks that form the LV2 framework.

LV2 gaining momentum

Bitwig Studio to be released

The 26th of March Bitwig Studio will be released. From the Bitwig Studio site:

Bitwig Studio is a multi-platform music-creation system for production, remixing and performance with a focus on flexible editing tools and a super-fast workflow.

It’s being developed by folks who have worked on Ableton Live and it will also be available for Linux. It’s a cross-platform DAW which means that for the GUI a platform agnostic framework has been used. In the case of Bitwig Studio the chosen framework is most probably Java which raised some eyebrows within the Linux Audio community. The price of the upcoming product met some scepticism too as it ends up higher than initially announced. Add to this that there’s barely any support for plugins (except native Linux VST) and you’ll understand that this upcoming release has fueled a discussion or two.

I haven’t seen anything yet of Bitwig Studio so I can’t judge the quality, workflow or usability of the product. I’ve registered for a beta testing account two years ago and didn’t hear anything from the Bitwig folks until recently so to be honest I completely lost interest in the product in the meanwhile.

Really, the people from Tracktion do it a lot better in that regard I think, it’s cheaper, they communicate more and it’s based on a cross-platform toolkit that has more credibility (Juce). But you never know, maybe I’ll get blown away when I get my hands on Bitwig Studio. You’ll be the first to hear.

Bitwig Studio to be released

A week without a Mac

Got my new workstation last week. Ultimately I decided to opt for a Dell notebook system with Linux pre-installed. So that left me only one single option: the XPS 13 Developer Edition, aka Sputnik 3. After having worked with it for a week I can only say I’m very, very happy with it. Unboxing it was a joy in itself, unwrapping the amazingly sleek machine and booting it for the first time. The XPS 13 comes with Ubuntu 12.04 LTS pre-installed which is just fine for me, especially given the fact that everything seems to work flawlessly so far. I haven’t rebooted it for days for example, suspending it works brilliantly and when I open the lid the device wakes up instantly, even after having it closed for days. And even though it has an i7 CPU it can run for hours on a full battery. The touch screen is a nice bonus but I haven’t really made use of it yet, it could be quite cool for live perfomances though. I’ve tested the touch screen with seq24 and it’s quite awesome to be able to trigger sequences by pressing the sequences on your screen.

Dell XPS 13 Developer Edition

I did try a fresh install but it would take me a bit too much time to get everything working properly so in the end I opted for sticking with the default install and install the Lubuntu desktop on top of it. And the default install doesn’t get in the way so I’m all set. I’m now looking for a nice keyboard and mouse to pair with the notebook, I’d greatly appreciate any suggestions. I had already ordered a Logitech K290 but I’m sending it back because it has the function keys swapped with the media keys and I just can’t work with that. Switching tty’s with Fn+Ctrl+F[:digit:] is just impossible to do with that keyboard. I could’ve tried swapping the keys but I’ve already filled in the RMA form and repacked the keyboard so it’s going back.

Next up is configuring it for making music. I’m thinking about purchasing a new USB audio interface, preferably USB2.0, that matches well with this machine. Suggestions are very welcome. I’ve looked at the Focusrite Scarlett 2i4 but a recent thread on LAU raised some doubts. We’ll see, it’s something for later, for now I’m extremely happy with my new work horse.

A week without a Mac

Resolved JACK issues on notebook

Finally got around troubleshooting the issues I was facing with JACK on my notebook, a BTO that is actually a Clevo W170ER. Somehow I couldn’t go lower than -p128 with USB audio interfaces. When I thought I had tried every option, even disabling hyperthreading, I noticed two unidentified entries in my lsusb output:

Bus 001 Device 003: ID 8087:07da Intel Corp. 
Bus 002 Device 003: ID 5986:0401 Acer, Inc

The first entry is a Bluetooth adapter and the second entry is a webcam. Both devices are unnecessary when making music so I thought, why not unbind them. First I had to figure out their respective bus ID’s:

$ tree /sys/bus/usb/drivers/usb
/sys/bus/usb/drivers/usb
??? 1-1 -> ../../../../devices/pci0000:00/0000:00:1a.0/usb1/1-1
??? 1-1.3 -> ../../../../devices/pci0000:00/0000:00:1a.0/usb1/1-1/1-1.3
??? 2-1 -> ../../../../devices/pci0000:00/0000:00:1d.0/usb2/2-1
??? 2-1.6 -> ../../../../devices/pci0000:00/0000:00:1d.0/usb2/2-1/2-1.6
??? bind
??? uevent
??? unbind
??? usb1 -> ../../../../devices/pci0000:00/0000:00:1a.0/usb1
??? usb2 -> ../../../../devices/pci0000:00/0000:00:1d.0/usb2
??? usb3 -> ../../../../devices/pci0000:00/0000:00:14.0/usb3
??? usb4 -> ../../../../devices/pci0000:00/0000:00:14.0/usb4

Since the Bluetooth adapter sits on bus 1 and the webcam on bus two their respective ID’s should be 1-1 and 2-1. So I echoed the ID’s to the unbind file in the same directory:

$ echo -n "1-1" | sudo tee /sys/bus/usb/drivers/usb/unbind
$ echo -n "2-1" | sudo tee /sys/bus/usb/drivers/usb/unbind

Good riddance:

$ lsusb
Bus 001 Device 002: ID 8087:0024 Intel Corp. Integrated Rate Matching Hub
Bus 002 Device 002: ID 8087:0024 Intel Corp. Integrated Rate Matching Hub
Bus 001 Device 001: ID 1d6b:0002 Linux Foundation 2.0 root hub
Bus 002 Device 001: ID 1d6b:0002 Linux Foundation 2.0 root hub
Bus 003 Device 001: ID 1d6b:0002 Linux Foundation 2.0 root hub
Bus 004 Device 001: ID 1d6b:0003 Linux Foundation 3.0 root hub

Then I started JACK again with -p64 using an USB audio interface connected to bus 3 (so no rate matching hub in between) and no more xruns, not even with a generic kernel and using WiFi and all. Next hurdle is the onboard sound. Below -p128 I get bursts of massive xruns and so far I didn’t manage to pinpoint the culprit.

Edit #1: I’ve found out that the Bluetooth adapter is the main bottleneck. Also, by echoing the aformentioned ID’s (1-1 and 2-1) you disable the whole USB bus apparently. To disable just the USB device echo the last ID in the respective path names, so for the Bluetooth adapter that’s 1-1.3 and for the webcam 2-1.6. This way you can still use the USB bus on which these devices are residing. In my case disabling the whole bus is not an option, this would mean I’d have to connect all my USB interfaces to bus 3 (bus 4 doesn’t have any external inputs) which could result in these devices getting in each other’s way with regard to bandwidth. After echoing the ID’s the output of the tree command looks like this:

$ tree /sys/bus/usb/drivers/usb
/sys/bus/usb/drivers/usb
??? 1-1 -> ../../../../devices/pci0000:00/0000:00:1a.0/usb1/1-1
??? 2-1 -> ../../../../devices/pci0000:00/0000:00:1d.0/usb2/2-1
??? bind
??? uevent
??? unbind
??? usb1 -> ../../../../devices/pci0000:00/0000:00:1a.0/usb1
??? usb2 -> ../../../../devices/pci0000:00/0000:00:1d.0/usb2
??? usb3 -> ../../../../devices/pci0000:00/0000:00:14.0/usb3
??? usb4 -> ../../../../devices/pci0000:00/0000:00:14.0/usb4

The lsusb command still shows the devices though.

Edit #2: unbinding drivers like described above won’t persist across reboots. If you’d like to make the unbinding persistent you could add the unbind command to /etc/rc.local or create a script that runs at login. There are other options of course like blacklisting the Bluetooth drivers.

Resolved JACK issues on notebook

Living in a shell

Since I started working for my new employer the amount of time I’m spending inside a terminal window is rapidly increasing. And I like it. I’m learning more in a few months than I did in the past 5 years. I’m discovering superhandy commands and utilities that I had never used or even heard of before. Utilities like w, last and the various *stat utilities. And I’m becoming better and better in using utilities that I already know but that always remained hard to grasp simply because I didn’t use them extensively. Think of Vim, screen and sed. Or on a lower level, the Bash shell itself.

I’m particularly starting to develop a fondness for Vim. I’ve worked myself through a complete Vim book and when I finished it I was like, Vim is not arcane at all, it’s actually quite simple. It’s all about terseness, doing things in the fastest, most efficient way, memorizing the most important commands and forcing myself to use it for things I would normally do in say, gedit. So now I find myself easily copying whole blocks of text, commenting and uncommenting multiple lines with just a few keystrokes, using markers and buffers and browsing faster through files than possible with a mouse.

Currently I’m reading a book on Bash and it already provided me with a lot of new insights and ideas that I could use in my daily work. My scripting skills are a bit feeble so hopefully this book will help me to improve these. Luckily I have great colleagues that are very knowledgeable when it come to things like Bash and Vim so I’m coming along just fine. But I want to be able to purge a Sendmail mail queue filled with spam like I saw one of my colleagues do recently. What he did on top of his head was just amazing:

for i in `ls | grep qfr`; do w=`grep example.org $i | wc -l`; if [ "$w" != "0" ]; 
then echo $i | sed -e 's/^qfr//'; fi;  done | sed -e 's/^/*/' | xargs -n 50000;

This allowed him to create a list of all spam messages which he simply ran through rm. It’s no rocket science but I’d really like to be that proficient too. Another colleague of mine is just awesome with regular expressions and Vi. For example, I recently asked him how I could delete all text between parentheses including the parentheses, for example a list of packages I copied from /var/log/apt/history.log, and he immediately replied %s/([^)]*)//g. Yes, I’m blessed that I can work in such an inspiring environment.

Living in a shell

A month on a Mac

During the second job interview with my new employer I was asked if I’d like to use a Mac or a Windows PC with the assurance I’d get a Linux workstation after my probation time. Just put me behind a Mac then, that’s closer to Linux than Windows and from what I recalled it comes with a native terminal that does SSH. And what do I need more?

So there I am in front of a big, glossy screen and a tiny keyboard that lacks some familiar keys. My findings so far? Kind of neutral. I’ve got my terminal and I can run SSH from the CLI so I’m happy. There are some quirks that annoy me though (in no particular order):

  • No Compose key and I had to jump through quite some hoops to map a key as a Compose key.
  • No easy way to map a keyboard shortcut for opening a terminal. I had to resort to something called ‘Automator’ to get it working. And it still doesn’t work the way I want too. When there are no windows open pressing the shortcut doesn’t do anything. When there are open windows it works but why does it open two terminals when pressing the shortcut for the first time? Not a real big deal as I need multiple terminals anyway (I just can’t get used to tabbed terminals).
  • I prefer non-glare monitors to glossy ones.
  • No Home, End, PageDown and PageUp keys. Not a real big deal either, in fact, it’s a real good incentive to start getting accustomed to Vi(m) shortcuts since I kind of live inside Vim these days. I even bought this, great stuff.
  • Can’t get used to the default window management settings. For instance when you minimize a window and Alt+Tab to it the window doesn’t open. So I’m not minimizing any windows anymore since this is really annoying. Haven’t looked into changing this behaviour though, it’s probably something relatively simple.
  • Annoying pop-ups from updates and programs that are downloaded from the internet (“blabla” is an application downloaded from the Internet. Are you sure you want to open it?). Especially the latter ones are annoying. Disabling the pop-ups has to be done from a terminal. Wow, so much for a “user-friendly” OS.
  • Clicking the close button of an application doesn’t quit it. Cmd+Q does. This is something I won’t get used to either. Actually I don’t want to get used to the Cmd button at all.
  • I prefer a panel with a window list on it. I don’t know how other folks do it but this Alt+Tab stuff is counter-efficient in my case.

Are there things I particularly like about Mac OS X or the Mac itself? Actually no, can’t think of anything. Yeah, the keyboard feel is really nice but that pro gets nulled out because of the missing keys, ~ being placed next to the left Shift key and the Fn keys being mapped to the F1/F12 keys. Add to this the meaningless keys with all kinds of arrows on them and this key with a crossed square. No idea what they do. On a software level MacPorts is nice, it allowed me to install some of my favorite tools that I found were missing. Other than that I can’t wait to have my own workstation with Linux on it. The plan is that I get a Dell XPS 15 with a dual monitor setup. Something to look forward to.

And yes, I have to deal with quite some Windows servers now. I’m not going to dedicate a blogpost to my findings on that OS. Just one word. Meh.

A month on a Mac

Jack2 on Android

This mail just popped up on jack-devel:

Hello, I have news of JACK2 in android world!

Recently, Samsung released professional audio sdk on android platform which based on JACK2. It is a part of latest Samsung Mobile SDK: http://developer.samsung.com/samsung-mobile-sdk#professional-audio

Source code of JACK2 was retrieved from Samsung’s Open Source Release Center(OSRC) at http://opensource.samsung.com/. You can find current repository & more information at below link: https://github.com/KimJeongYeon/jack2_android

Additionally, SAMSUNG DEVELOPER CONFERENCE(October 28-29, 2013) will be held in San Francisco that one of sessions prepared to introduced professional audio on Samsung’s android mobile products: http://www.samsungdevcon.com/
Session : “Leveraging the Latest Features in Professional Audio Framework in Your App”

Thanks,
KimJeongYeon

Message says it all I guess. Apparently Samsung has developed a way to do pro audio on Android based on JACK Audio Connection Kit! Can’t wait to get my hands on this, stoked.

Jack2 on Android

Using a Raspberry Pi as a piano

Recently I posted about my successful attempt to get LinuxSampler running on the Raspberry Pi. I’ve taken this a bit further and produced a script that turns the Raspberry Pi into a fully fledged piano. Don’t expect miracles, the sample library I used is good quality so the RPi might choke on it every now and then with regard to disk IO. But it’s usable if you don’t play too many notes at once or make extensive use of a sustain pedal. I’ve tested the script with a Class 4 SD though so a faster SD card could improve stability.

Edit: finally got around buying a better SD card and the difference is huge! I bought a SanDisk Extreme Class 10 SD card and with this SD card I can run LinuxSampler at lower latencies and I can play more notes at once.

Before you can run the script on your Raspberry Pi you will need to tweak your Raspbian installation so you can do low latency audio. How to achieve this is all described in the Raspberry Pi wiki article I’ve put up on wiki.linuxaudio.org. After you’ve set up your RPi you will need to install JACK and LinuxSampler with sudo apt-get install jackd1 linuxsampler. Next step is to get the Salamander Grand Piano sample pack on your RPi:

cd
mkdir LinuxSampler
cd LinuxSampler
wget -c http://download.linuxaudio.org/lau/SalamanderGrandPianoV2
/SalamanderGrandPianoV2_44.1khz16bit.tar.bz2
wget -c http://dl.dropbox.com/u/16547648/sgp44.1khz_V2toV3.tar.bz2
tar jxvf SalamanderGrandPianoV2/SalamanderGrandPianoV2_44.1khz16bit.tar.bz2
tar jxvf sgp44.1khz_V2toV3.tar.bz2 -C SalamanderGrandPianoV2_44.1khz16bit
--strip-components=1

Please note that decompressing the tarballs on the RPi could take some time. Now that you’ve set up the Salamander Grand Piano sample library you can download the script and the LinuxSampler config file:

cd
mkdir bin
wget -c https://raw.github.com/AutoStatic/scripts/rpi/piano -O /home/pi/bin/piano
chmod +x bin/piano
wget -c https://raw.github.com/AutoStatic/configs/rpi/home/pi/LinuxSampler
/SalamanderGrandPianoV3.lscp -O
/home/pi/LinuxSampler/SalamanderGrandPianoV3.lscp

Almost there. We’ve installed the necessary software and downloaded the sample library, LinuxSampler config and piano script. Now we need to dot the i’s and cross the t’s because the script assumes some defaults that might be different in your setup. Let’s dissect the script:

#!/bin/bash

if ! pidof jackd &> /dev/null
then
  sudo killall ifplugd &> /dev/null
  sudo killall dhclient-bin &> /dev/null
  sudo service ntp stop &> /dev/null
  sudo service triggerhappy stop &> /dev/null
  sudo service ifplugd stop &> /dev/null
  sudo service dbus stop &> /dev/null
  sudo killall console-kit-daemon &> /dev/null
  sudo killall polkitd &> /dev/null
  killall gvfsd &> /dev/null
  killall dbus-daemon &> /dev/null
  killall dbus-launch &> /dev/null
  sudo mount -o remount,size=128M /dev/shm &> /dev/null
  echo -n performance
| sudo tee /sys/devices/system/cpu/cpu0/cpufreq/scaling_governor &> /dev/null
  if ip addr | grep wlan &> /dev/null
  then
    echo -n "1-1.1:1.0" | sudo tee /sys/bus/usb/drivers/smsc95xx/unbind &> /dev/null
  fi
  jackd -P84 -p128 -t2000 -d alsa -dhw:UA25 -p512 -n2 -r44100 -s -P -Xseq
&> /dev/null &
fi

This is the first section of the script. An if clause that checks if JACK is already running and if that’s not the case the system gets set up for low latency use, a simple check is done if there is an active WiFi adapter and if so the ethernet interface is disabled and then on the last line JACK is invoked. Notice the ALSA name used, hw:UA25, this could be different on your RPi, you can check with aplay -l.

jack_wait -w &> /dev/null

jack_wait is a simple app that does nothing else but checking if JACK is active, the -w option means to wait for JACK to become active.

if ! pidof linuxsampler &> /dev/null
then
  linuxsampler --instruments-db-location $HOME/LinuxSampler/instruments.db
&> /dev/null &
  sleep 5
netcat -q 3 localhost 8888
< $HOME/LinuxSampler/SalamanderGrandPianoV3.lscp &> /dev/null &
fi

This stanza checks if LinuxSampler is running, if not LinuxSampler is started and 5 seconds later the config file is pushed to the LinuxSampler backend with the help of netcat.

while [ "$STATUS" != "100" ]
do
  STATUS=$(echo "GET CHANNEL INFO 0" | netcat -q 3 localhost 8888
| grep INSTRUMENT_STATUS | cut -d " " -f 2 | tr -d 'rn')
done

A simple while loop that checks the load status of LinuxSampler. When the load status has reached 100% the script will move on.

jack_connect LinuxSampler:0 system:playback_1 &> /dev/null
jack_connect LinuxSampler:1 system:playback_2 &> /dev/null
#jack_connect alsa_pcm:MPK-mini/midi_capture_1 LinuxSampler:midi_in_0 &> /dev/null
jack_connect alsa_pcm:USB-Keystation-61es/midi_capture_1 LinuxSampler:midi_in_0
&> /dev/null

This part sets up the necessary JACK connections. The portnames of the MIDI devices can be different on your system, you can look them up with jack_lsp which will list all available JACK ports.

jack_midiseq Sequencer 176400 0 69 20000 22050 57 20000 44100 64 20000 66150 67 20000 &
sleep 4
jack_connect Sequencer:out LinuxSampler:midi_in_0
sleep 3.5
jack_disconnect Sequencer:out LinuxSampler:midi_in_0
killall jack_midiseq

This is the notification part of the script that will play four notes. It’s based on jack_midiseq, another JACK example tool that does nothing more but looping a sequence of notes. It’s an undocumented utility so I’ll explain how it is invoked:

jack_midiseq

<command> <JACK port name> <loop length> <start value> <MIDI note value> <length value>

Example:
jack_midiseq Sequencer 176400 0 69 20000 22050 57 20000 44100 64 20000 66150 67 20000

JACK port name: Sequencer
Loop length: 4 seconds at 44.1 KHz (176400/44100)
Start value of first note: 0
MIDI note value of first note: 69 (A4)
Length value: 20000 samples, so that's almost half a second
Start value of second note: 22050 (so half a second after the first note)
MIDI note value of second note: 57 (A3)
Length value: 20000 samples
Start value of third note: 44100 (so a second after the first note)
MIDI note value of second note: 64 (E4)
Length value: 20000 samples
Start value of third note: 66150 (so one second and a half after the first note)
MIDI note value of second note: 67 (G4)
Length value: 20000 samples

Now the script is finished, the last line calls exit with a status value of 0 which means the script was run successfully.

exit 0

After making the script executable with chmod +x ~/bin/piano and running it you can start playing piano with your Raspberry Pi! Again, bear in mind that the RPi is not made for this specific purpose so it could happen that audio starts to stutter every now and then, especially when you play busy parts or play more than 4 notes at once.


Using a Raspberry Pi as a piano: quick demo

Using a Raspberry Pi as a piano